Video Tutorial:
Step-by-step:
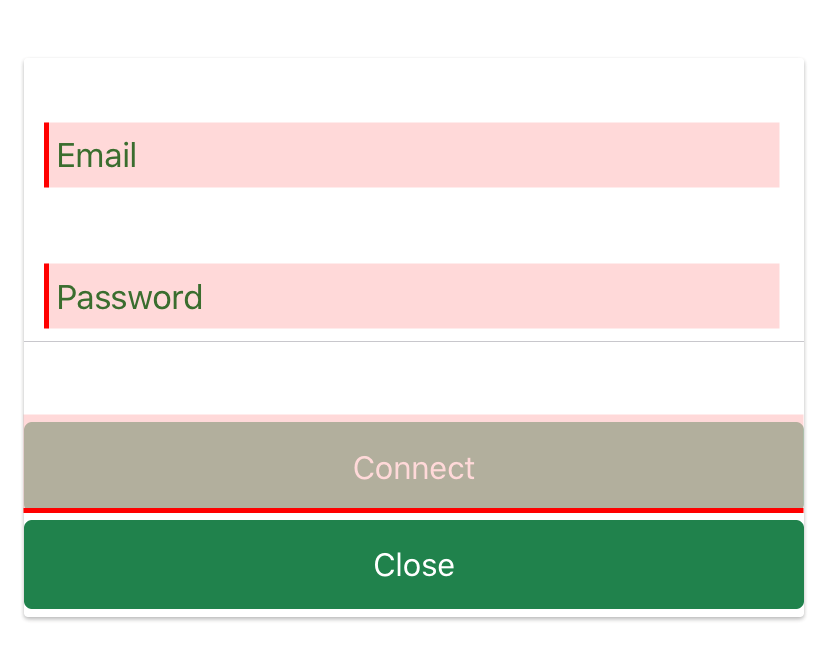
1. Connect the App to the gateway.
Note: You will need an email address and password that is controlled by your administrator.
2. Select your live AGRIS data set.
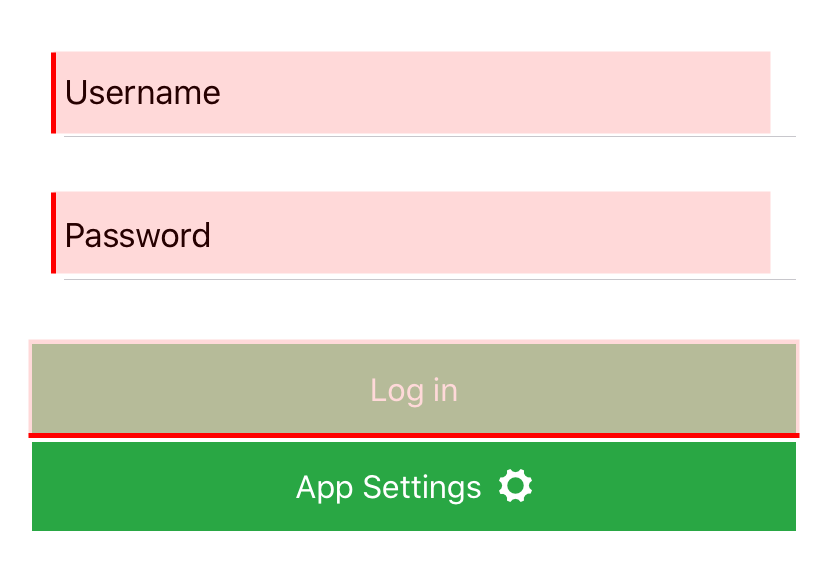
3. Log in with your AGRIS username and password.
Setup your settings for the first time:
1. Press on the Location Code to select the location with the inventory that you wish to display.
2. Select Name Id Type Range if you would like the customer search only look for specific Name Id Types.
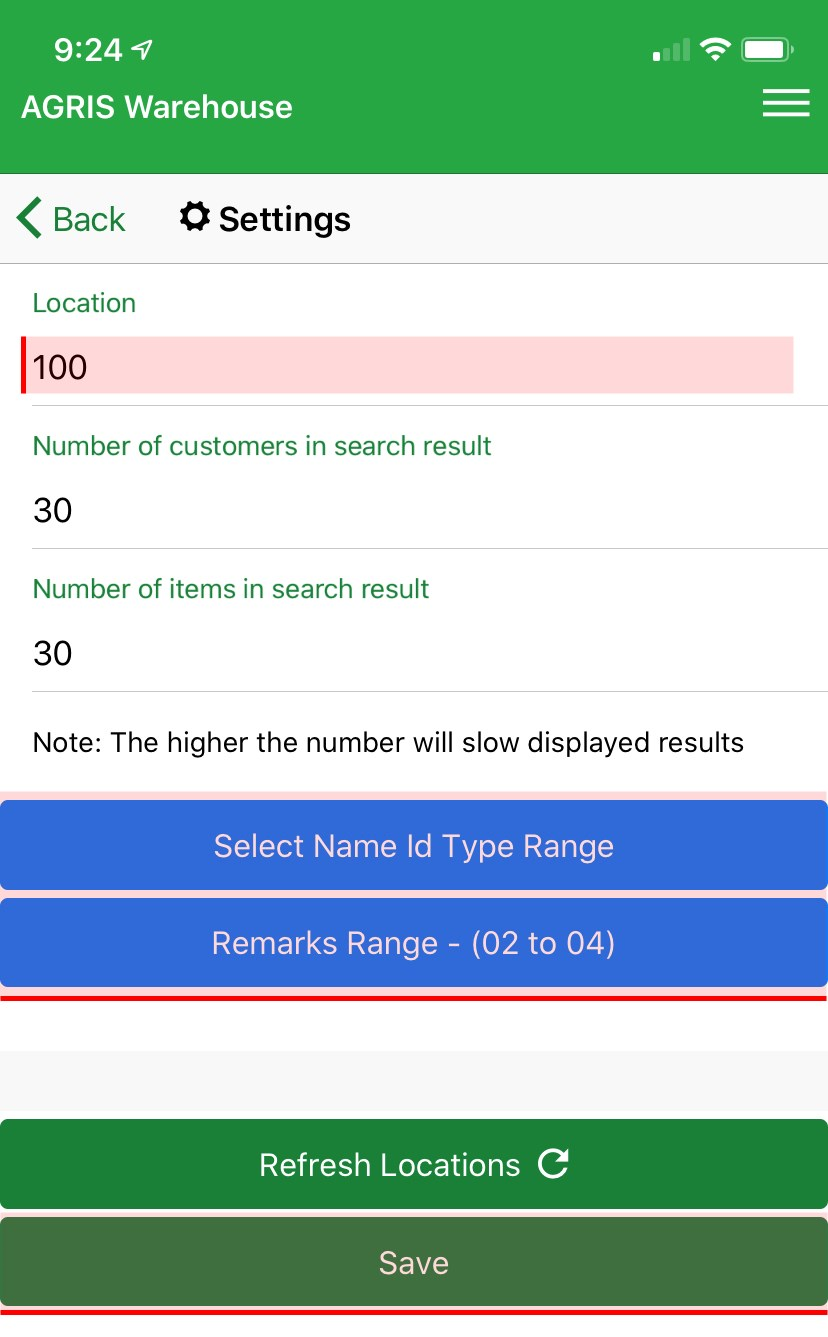
3. Select Remarks Range. Press Save.
Remarks Range Notes:
- These Remarks are for Shipments that flow on to the Delivery Ticket transaction.
- Make sure that the remarks range selected is available in AGRIS (i.e., INV > Setup Information > Invoicing Setup Options > 3) Delivery Ticket Remark Options > Delivery Ticket Remark Options (screens 1-3)).
- You may also want to verify or modify your Delivery Ticket form to print the remarks range on the form.
4. Press Save.
Learn More:


